
How to call OnPremise WebAPI from Canvas App
In a time where technology is very fast changing, I see some of the Organizations that still rely on so-called legacy systems or probably still depend on system
Understanding how to call OnPremise WebAPI from Canvas App is essential in an era where technology is fast-paced. There are still organizations that use legacy systems or those that operate on their network (on-premise).
- Create WebAPI. This is the first step in the process. It is crucial in enabling the communication between the app and the legacy system.
- Canvas App establishment is next. It serves as the environment where the app and WebAPI will interact.
- Finally, practice calling the OnPremise WebAPI from the established Canvas App. This is a continuous process aimed at improving the compatibility and functionality of the app and the WebAPI, respectively.
Continue with these steps to successfully call OnPremise WebAPI from any Canvas App effectively.
Calling an on-premise WebAPI from a Canvas App can be a complex task, but with the right knowledge and tools, it is possible to make the process as smooth as possible. In this article, we will take a look at how to create a WebAPI for an on-premise system, configure it for use in a Canvas App, and make the necessary calls to the WebAPI from the Canvas App. We will also discuss the security considerations that must be taken into account before making calls to an on-premise WebAPI. Finally, we will look at some of the best practices that should be followed when making calls to an on-premise WebAPI from a Canvas App.
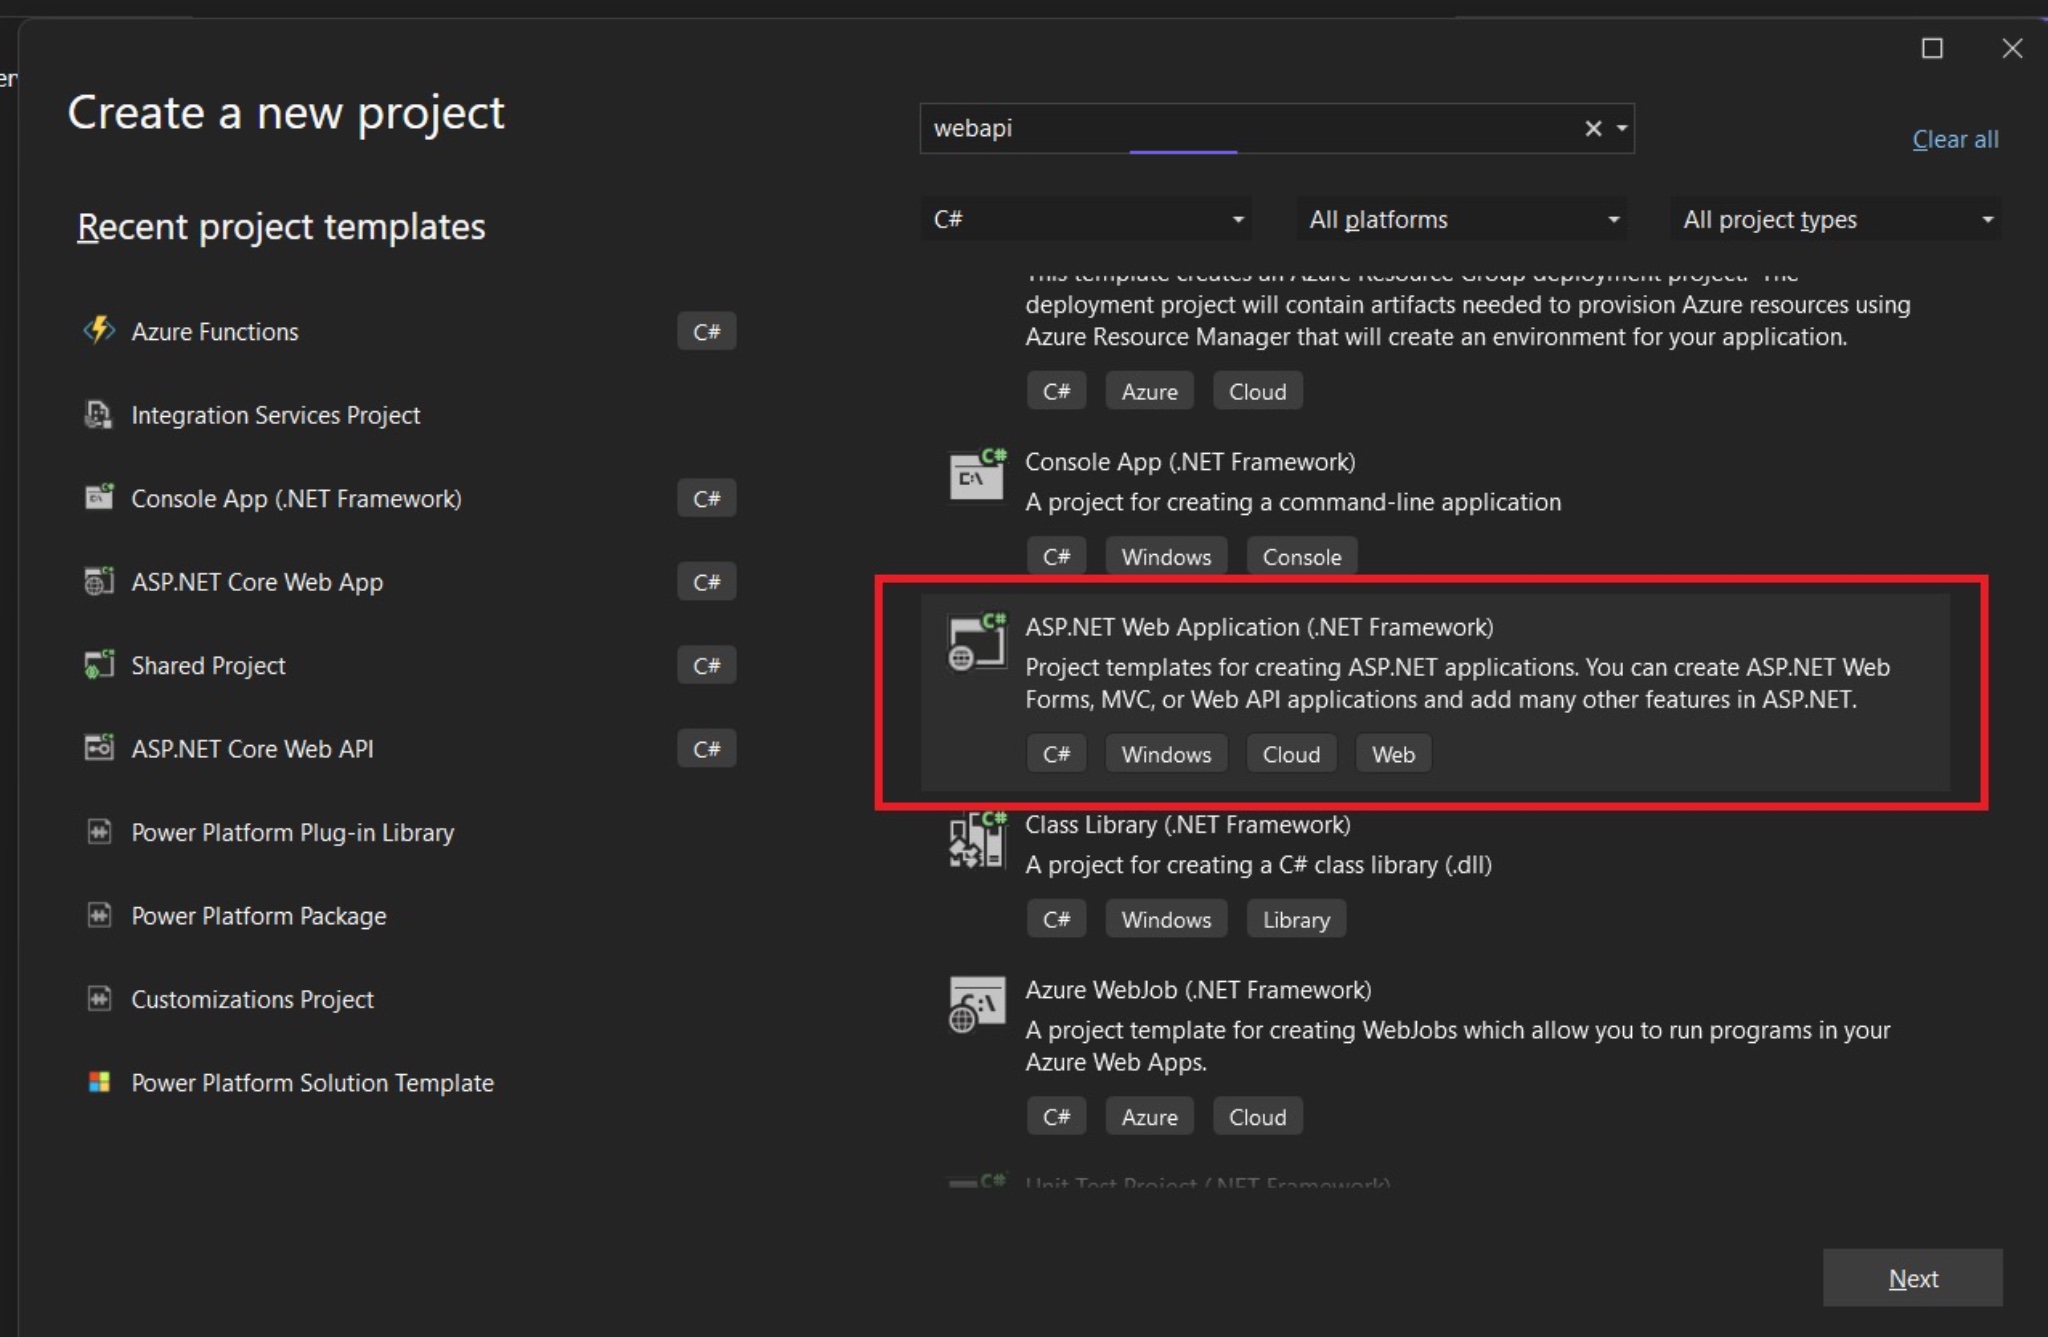
To start, we will look at how to create a WebAPI for an on-premise system. This involves setting up an endpoint that can accept and respond to requests from a Canvas App. The endpoint should be secure and should adhere to certain standards such as Transport Layer Security (TLS). The endpoint should also be properly authenticated and authorized to ensure that only authorized requests are accepted and responded to.
Deep Dive into Calling OnPremise WebAPI in Canvas App
Calling an OnPremise WebAPI from Canvas App depends on the successful creation of the app and the WebAPI. The process involves a series of steps that need to be carefully followed. The interaction between the app and the WebAPI is paramount for the smooth operation of the system and to achieve the desired results. Reiterate this process and improve the connection to boost the overall functionality of the system.
Read the full article How to call OnPremise WebAPI from Canvas App
Setting Up and Using Power Automate Desktop Flow
Pre-requisites:
Ensure you have the latest version of Power Automate.
Download the latest installer and tutorial on adding a machine for triggering the flow.
Installation and Setup:
Install and launch Power Automate: machine runtime.
Navigate to Machine settings and ensure your computer is listed. Change the default environment to your testing/usage environment.
Creating the Flow:
Open Power Automate application on your machine.
Log in with desired credentials and select the Environment.
- Choose Create New Flow.
- Name the flow (e.g., “Execute Greeting API”).
- Under HTTP section, choose “Invoke web service” and set parameters like URL, Method, etc.
Create an Output to save the API's result.
Use Set Variable action to assign the WebServiceResponse to the Message output variable.
Verification and Use:
Save the flow.
For demonstration, a Canvas App called Demo Canvas Apps was created.
Create a new flow for “Canvas App Greeting” to use “Run a flow built with Power Automate for Desktop” based on machine settings.
Follow steps to execute the Power Automate Desktop Flow and obtain the message.
Result:
Running the Canvas App will yield a result.
Observation: The operation took approximately 21 seconds - slightly slow, but effective for organizations with restrictions to achieve a "low code" approach for legacy API calls.
Learn about How to call OnPremise WebAPI from Canvas App
Calling an on-premise WebAPI from a Canvas App can be a complex task, but with the right knowledge and tools, it is possible to make the process as smooth as possible. In this article, we will take a look at how to create a WebAPI for an on-premise system, configure it for use in a Canvas App, and make the necessary calls to the WebAPI from the Canvas App. We will also discuss the security considerations that must be taken into account before making calls to an on-premise WebAPI. Finally, we will look at some of the best practices that should be followed when making calls to an on-premise WebAPI from a Canvas App.
To start, we will look at how to create a WebAPI for an on-premise system. This involves setting up an endpoint that can accept and respond to requests from a Canvas App. The endpoint should be secure and should adhere to certain standards such as Transport Layer Security (TLS). The endpoint should also be properly authenticated and authorized to ensure that only authorized requests are accepted and responded to.
Once the WebAPI has been created, it needs to be configured for use in a Canvas App. This involves providing the Canvas App with the necessary information to make the call to the WebAPI. This includes the URL of the endpoint, the authentication type, the authentication credentials, and any additional parameters that may be required. It is also important to configure the WebAPI so that it can accept requests from the Canvas App.
Once the WebAPI is configured, it is time to make the call from the Canvas App. This involves sending a request to the endpoint, and then handling the response that is returned. Depending on the type of call that is being made, different types of data might be returned, and this needs to be handled accordingly. It is also important to consider the security implications when making calls to an on-premise WebAPI from a Canvas App.
Finally, it is important to follow certain best practices when making calls to an on-premise WebAPI from a Canvas App. This includes ensuring that the request and response are encrypted, validating input data, and using appropriate authentication and authorization methods. Additionally, it is important to follow best practices for logging and monitoring, as this will help to ensure that any issues are identified and addressed quickly.
In summary, calling an on-premise WebAPI from a Canvas App can be a complex process, but following the steps outlined in this article can make it much easier. By creating and configuring the WebAPI for use in a Canvas App, making the necessary calls, and following best practices, it is possible to ensure that the process of making calls to an on-premise WebAPI from a Canvas App is as secure and efficient as possible.
More links on about How to call OnPremise WebAPI from Canvas App
- Connect to custom on-premises APIs using data gateway
- Oct 26, 2017 — Start by navigating to the Microsoft Flow or the PowerApps web portal and click on the Gear menu > Custom Connector. Click + New Custom ...
- Creating & using a Custom Connector in Canvas App ...
- Open the Canvas App studio and navigate to Dataverse >> Custom Connectors. Click on +New Custom Connector and select “Create from blank”.
- Calling HTTP endpoints via On-premises data gateway
- May 30, 2020 — Recently, we have been working on an integration of a customer's on-premises system with Power Apps. The on-premises system is not accessible ...
- How to Create a Custom Connector in Powerapps
- 1- Sign in to Power Apps. 2- Create a new app or use an existing one. ... 3- Add the existing Custom Connector: On the left pane, Data, Select Add Data, Select ...
- How To Create A PowerApps Custom Connector From API?
- Mar 14, 2021 — Open Power Apps Maker site. Select “Data“, choose “Custom Connector“. Then click “New custom connector” and choose the type of your custom ...
- Design REST Power Apps
- Connect to REST Through the API Server · In Microsoft Power Apps, click Custom connectors. · Click Create custom connector and choose Import an OpenAPI file.
- How to access on premise resources with Power Automate
- Sep 21, 2021 — How to access on premise resources with Power Automate. 1. Introduce. The on-premises data gateway acts as a bridge.
- power apps | D365 Demystified | Page 2
- Install On-Premise Gateway from Power Automate or Power Apps | Power Platform ... Call a Flow from Canvas Power App and get back response | Power Platform\ ...
Keywords
accessing on-premise webapi, canvas app webapi, on-premise webapi calling, legacy systems webapi, webapi from canvas apps