Microsoft Teams Call Flows: Quick Bulk Deployment with PowerShell
Create a Microsoft Teams call flow from scratch in minutes using PowerShell, following this step-by-step guide by a Microsoft expert.
Streamlining Microsoft Call Flows Generation with PowerShell Made Easy
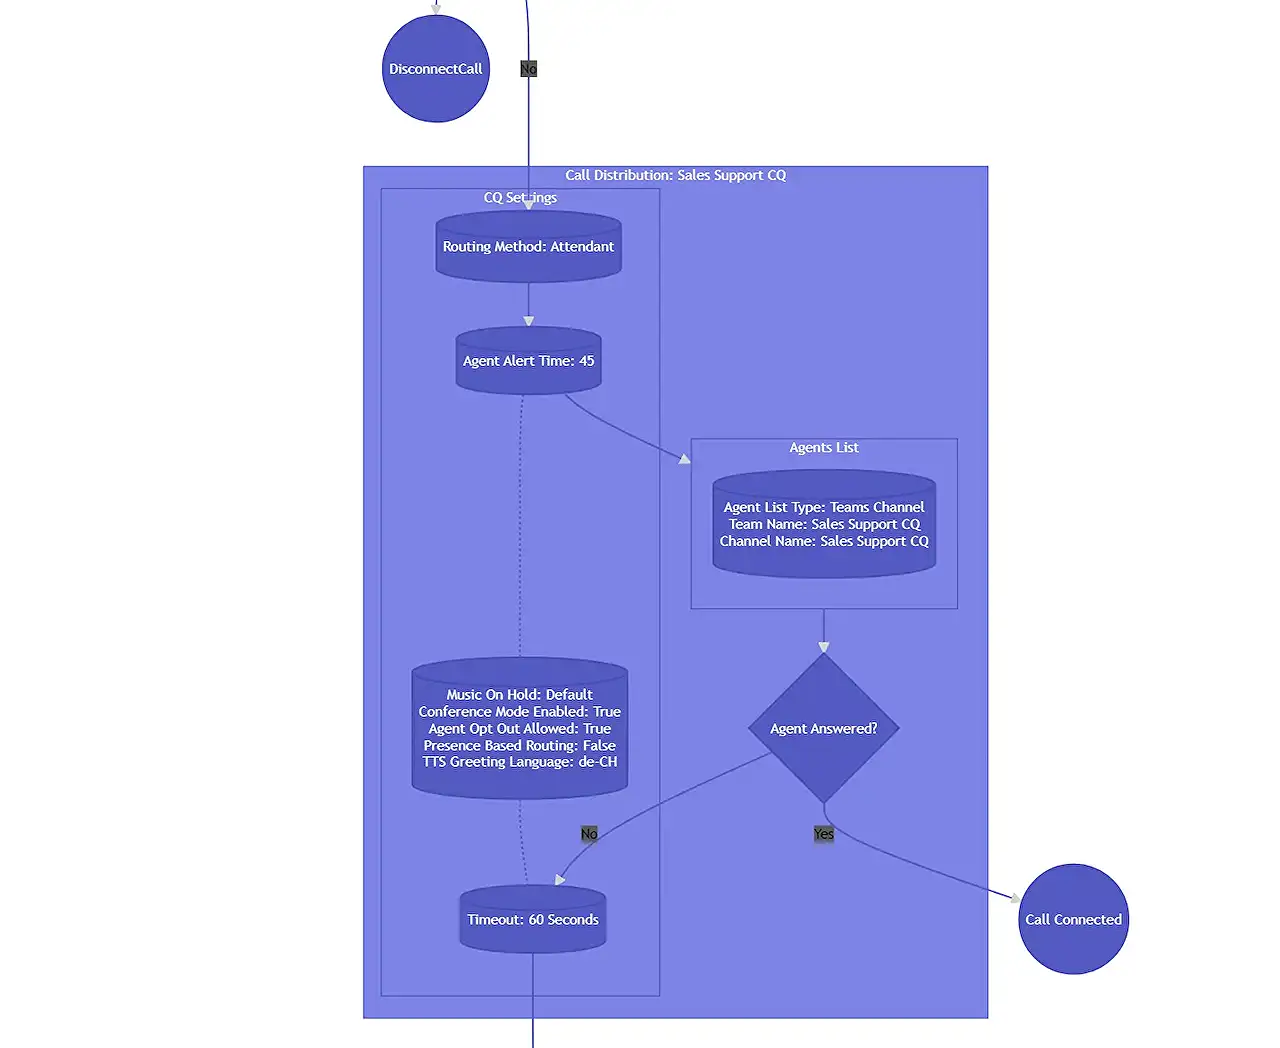
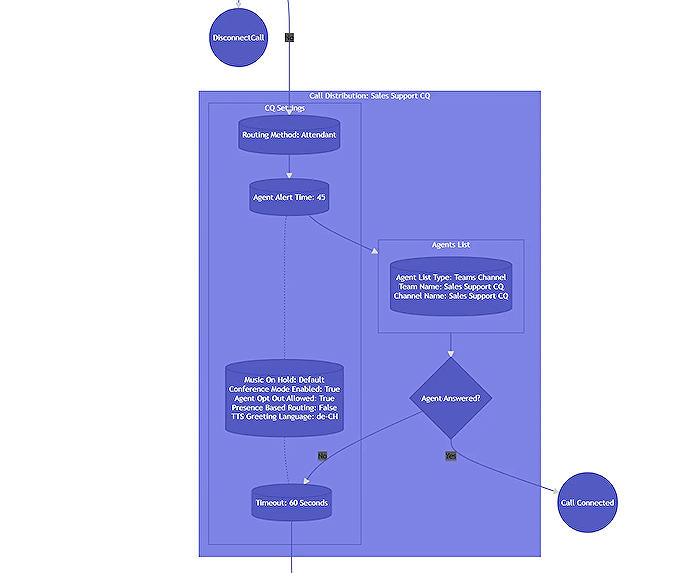
Microsoft Teams, a popular collaborative tool, offers a feature called M365 Call Flow Visualizer that allows users to retrieve configurations for auto attendants and call queues that have already been constructed using PowerShell. However, this blog post by Martin Heusser is focused on demonstrating how we can utilize PowerShell to create a new call flow from scratch, with much ease and within a few minutes. The call flow produced will be basic yet fully functional, and the post essentially aims to guide us through the process, with the end responsibility being to add users to the Team.
Creating a successful call flow involves several steps, and it is crucial to remember the sequence to ensure speedy processing. Some of these steps include creating resource accounts, assigning a phone number and voice routing policy, configuring M365 Group for Follow in Inbox and Show in Outlook, creating and configuring the Call Queue, and finally setting up the Auto Attendant and configuring it for forwarding to the queue during working hours. Challenges can arise if you forget to set details, which can lengthen the process through propagation delays.
Having a script to create these call flows can mitigate potential errors and increase efficiency. As outlined in Heusser's blog post, the script is designed to align with best practices in building call flows, and takes into account stumbling blocks to ensure maximum efficiency in the deployment process. It isn't intended for creating complex call flows but serves as an efficient way to build call flows in an organized manner. The script takes care of various steps and successfully handles waiting periods, and it requires additional scopes for Microsoft Graph to function efficiently.
Making the Script Work
To utilize the script, users need to fill in their details in the VoiceAppList.csv file in Heusser's GitHub Repository. The details in the CSV file include DepartmentName, TopLevelNumber, NumberType, VoiceRoutingPolicyName, UsageLocation, AgentAlertTime, TimeoutThreshold, PromptLanguage, among others. Running the script deploys a simple call flow with Auto Attendant, business hours, and one Call Queue for each line in the CSV file.
Additionally, the script also creates a new Team and Channel for the Queue. The rationale behind using dedicated over existing Teams is to prevent potential complications that could arise from having all team members available for answering calls. Besides, the author's preference for dedicated groups lies in the fact that a new group ensures that only voicemails are received in the inbox and can enable Follow in Inbox.
The Final Stage
While the script does a great job preparing the call flow, it is still essential to add members to the queue manually as it lacks the capacity to add members automatically. Keep in mind that only members who are in the Team and are Enterprise Voice Enabled will be added to the queue’s list of agents. The use of PowerShell can also prove to be significantly helpful in laying the groundwork for your needs. The script created by Heusser provides a fundamental layer to which you can add specifics based on personal preference, thus saving ample time and resources in the whole process.
For more details about Teams, please follow this link
Read the full article Bulk Deploy Microsoft Teams Call Flows with PowerShell in Minutes

Learn about Bulk Deploy Microsoft Teams Call Flows with PowerShell in Minutes
Whether you're tech-savvy or a beginner trying to understand Microsoft Teams and PowerShell, I present a comprehensive guide to understanding the creation of a new call flow using PowerShell. The guide leverages PowerShell's capacity for automating tasks and scripting to deploy Microsoft Teams' calling flows in minutes.
This is possible by using the Microsoft 365 call flow visualizer that focuses on fetching configurations for Teams Auto Attendants and Call Queues, allowing you to create a functional call flow. The entire process terminates with the addition of users to a group, which is the only section you'll need to undertake manually.
Steps to Building a Call Flow:
- Create resource accounts
- License resource accounts
- Assign a phone number
- Create a Microsoft 365 group with a group, configuring it for Follow in Inbox and Show in Outlook
- Create and configure the Call Queue
- Assign the Resource Account to the Call Queue
- Create the Auto Attendant and configure forwarding to the queue during business hours
- Assign the Resource Account to the Auto Attendant
These steps may seem quite vast but the trick is remembering the correct order to reduce turnaround time. Some article links have been provided to help familiarise yourself more with resource accounts or shared voicemail.
The deployment script is not intended for super complex calling flows but rather aims for maximum efficiency. The script handles all the steppingstones involved in the process, ensuring each call flow is created in the correct order.
Connect-MgGraph module containing certain scopes e.g., User.ReadWrite.All, Group.ReadWrite.All, etc. is essential in the process, as the script requires the ExchangeOnlineManagement PowerShell module.
The “VoiceAppList.csv” file in the GitHub repository is an important tool in this process. Your information must be filled in it for it to run the script. The CSV file can accept values pertaining to DepartmentName, TopLevelNumber, NumberType, VoiceRoutingPolicyName, UsageLocation, among others.
Running the script helps deploy a call flow with an auto attendant, business hours, and a Call Queue, making the script very versatile. The script also automates creating a dedicated group for receiving voice-enabled channel calls and a voice mailbox.
After the script deployment, it is vital to add members to the queue for it to be technically able to receive calls and thereby signal any agent. This guide helps lay the groundwork for employing the Teams Auto Attendants (TAC), PowerShell, and Microsoft Teams together, especially for starters and less tech-savvy users.
The guide also links to official Microsoft documentation for creating Auto Attendants with PowerShell. It offers updated example scripts that can be used for reference or as a starting point for users who want to adjust the script to their specific needs.
More links on about Bulk Deploy Microsoft Teams Call Flows with PowerShell in Minutes
- Bulk Deploy Microsoft Teams Call Flows with PowerShell ...
- Feb 18, 2023 — In this article, I'm going to show you how you can create a basic, yet fully functional call flow with PowerShell. The only thing you'll need to ...
- Bulk Deploy Microsoft Teams Call Flows with PowerShell ...
- Bulk Deploy Microsoft Teams Call Flows with PowerShell in Minutes is a way to quickly and easily deploy call flows in Microsoft Teams using the powerful ...
- Martin Heusser's Post
- Have you ever tried to configure a Microsoft Teams Call Flow from A-Z using PowerShell? Including creating and licensing resource accounts and assigning ...
Keywords
Microsoft Teams Call Flows, Bulk Deploy, PowerShell, Deploy Teams Call Flows, PowerShell in Minutes, Microsoft Teams PowerShell, Microsoft Teams Bulk Deployment, PowerShell Call Flows, Teams Call Flows Deployment, Deploy Call Flows with PowerShell